Blocking
FAQs
I have been crocheting for a very long time. At the time of writing this, it’s been about 45 years, and I’ve learnt a lot along the way.
Here are my tips and advice for blocking crochet.
What
Is Blocking?
Blocking is a term used to describe
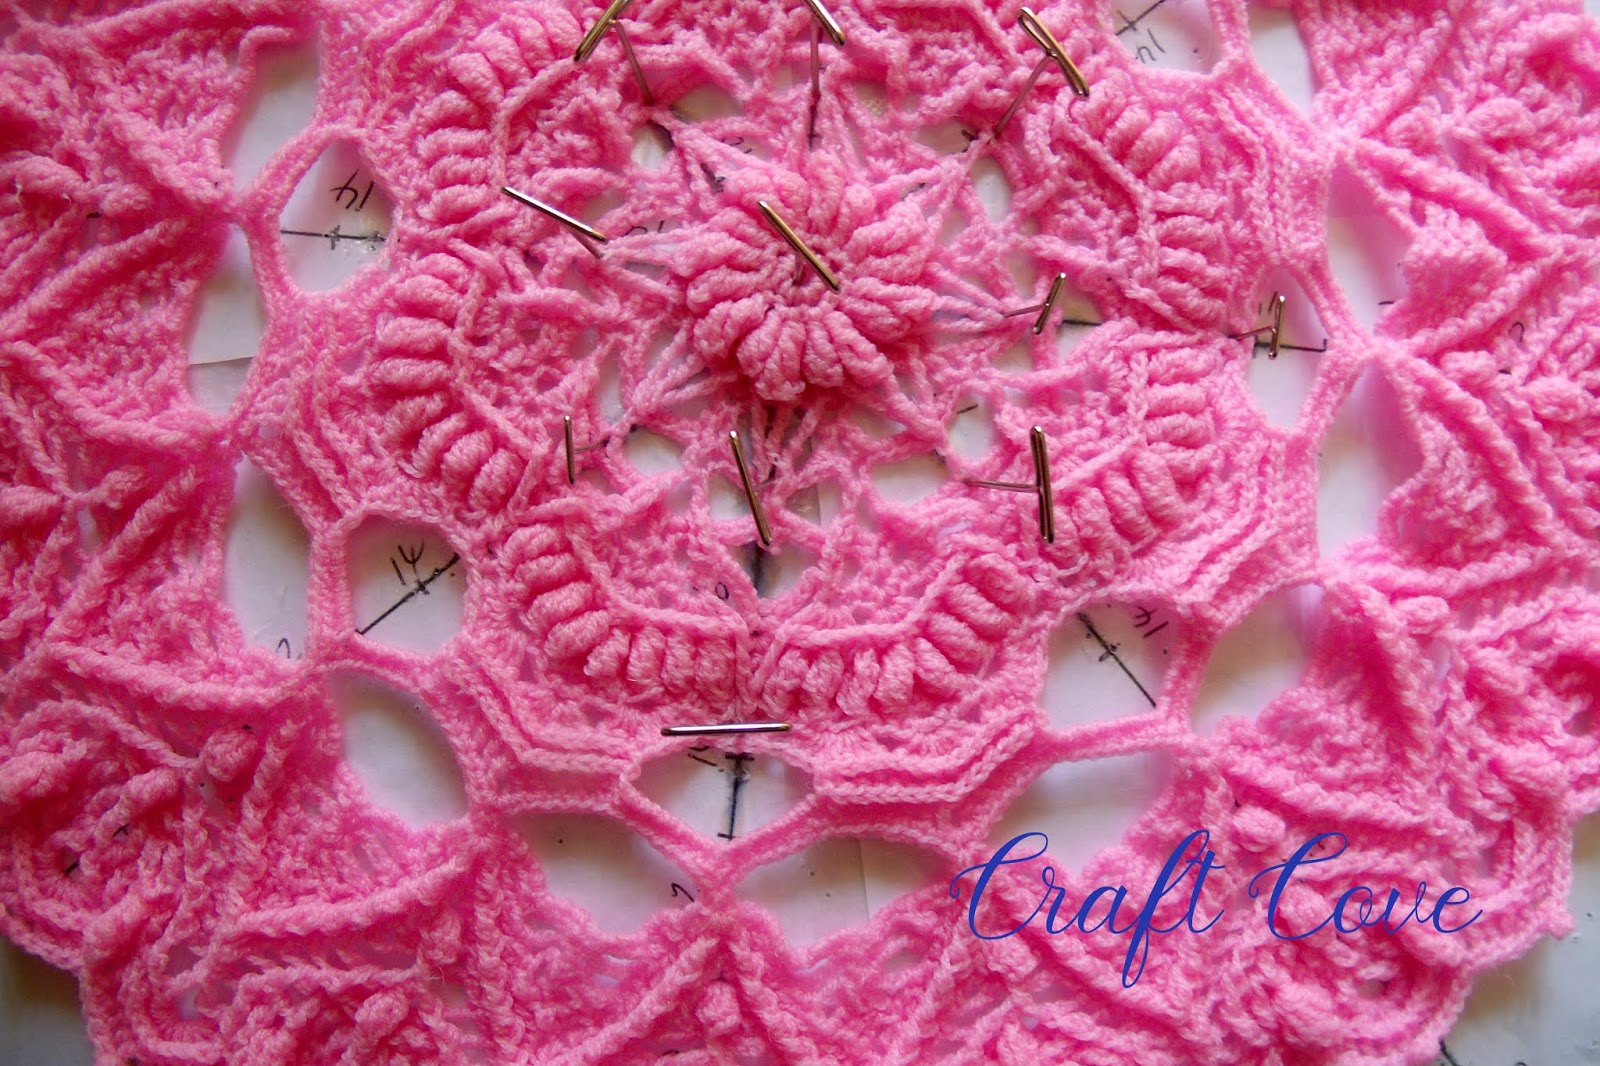
the process of pinning the crochet out to the proper shape and size.
There are several methods used
See How to Block for step by step
instructions
Is
Blocking Really Necessary?
People often ask if blocking is
necessary
The bottom line is that there are no hard and fast rules. You can do what you want — it’s your crochet.
But if you want your work to look neat and professional, blocking will help.
Blocking helps the stitches stand out and gives each one its own clear space. It also sets the work to a
particular shape and size. It can also stretch the item slightly, if
needed
But
do you need to do it to everything you crochet?
Not really. If you're making a doily
or snowflakes, it's definitely worth it. But if you are crocheting
blocks for a blanket, and they're all going to be joined up, it's
probably not worth it, unless the sizes are too different
Is
Blocking Permanent?
Sometimes.
If you block acrylic with heat, it
will be permanent
Cotton and wool will need a little bit
of blocking after each wash
Can
You Press Rather Than Block?
Again, it's up to you
BUT
it will flatten the stitches
you will not be able to set the work
to a particular shape
if it's acrylic, it may melt your
work, and stick to the iron
What
Tools are Required For Blocking?
rust-proof pins
spray bottle
towels or plastic
measuring tape
optional, steam iron or steamer
optional, blocking templates
What Can You Use as a Blocking Board?
Any firm flat surface that you can put
pins in will do
Any type of foam mats, including kids
play puzzle mats, floor tiles, or yoga mats
Just a few layers of cardboard wrapped
in cling wrap (I like this when I use a template underneath)
A carpeted piece of floor, covered
with towels
Even a mattress covered with lots of
towels or plastic
Or you can buy proper blocking boards
that have grids on them
If you need to block a lot of squares
for a blanket, you can put nails onto a wooden square board. Or drill
holes that can have small dowels put in
Do
you block squares before joining or after?
If your crochet has many pieces, such as granny squares being joined together or pieces of clothing, you will need to block the pieces individually before joining them.
What
if it's a big piece?
You
can put down lots of towels on the floor, or bed, and pin to that
Is
it difficult to do?
No,
it’s very easy
How
do you know where to block so the piece isn't over stretched?
Push it slightly outwards with your hands. This means it is only being pushed out slightly, rather than being stretched.
How
do you do it without damaging the stitches?
Don’t overstretch the item, and use lots of pins.
What Temperature Should the Water Be, and How Long Should It Soak?
It’s a good idea to check the yarn label for the recommended temperature. But if you don’t have the label, or are unsure, lukewarm or even cold water is fine.
Soaking for 5–10 minutes is usually long enough.
A light spray is also fine, but I prefer to saturate the whole item thoroughly.
How
long to dry?
This
can vary on temperature of the room, humidity, and dampness of the
piece
A
hairdryer (on cool setting) can help, or a fan
Tips for Wool, Acrylic, Cotton and Other Fibres
Be careful not to overwork wool, as it may felt.
Some people believe acrylic can’t be blocked, but I disagree. Blocking works perfectly on acrylic, and is generally
permanent. If you overheat it, you might “kill” it, ie, it will
go limp. But even when killed, it is still useful, and very soft
Cotton works well with steam blocking, but any other method is also fine.
What
pins to use
You
can use any pins that don’t rust
brass
or stainless steel are good options
nickel
plated pins may rust
wedding
dress pins or
t pins are
generally rust-proof
you
can also
buy
specific blocking pins and wires
Another
option is to use toothpicks
How
to pin?
Pin the centre. Then press the item outwards from the centre using your fingers. Pin again, press outwards again, and continue like this until you reach the outer edges.
I like to use a template under plastic, matching the circles to points on the crochet so I can keep it even.
Do
you flip it to dry other side?
No, you pin it right side up only.
Is
there any chance that colours will run during the blocking process?
What can I do if I’m concerned about this?
This will depend on your yarn. It’s best to test the yarn before starting your project.
But if you don’t know, try soaking the yarn or finished item in a vinegar solution for half an hour, then rinse thoroughly. Salt can also help.
How
wet does it have to be?
The item doesn’t even have to be wet; you can block it when it’s dry. However, I don’t find this very effective.
I find damp, but not dripping wet, followed by steaming, to be the most effective.
You can press it in a towel to remove some extra moisture.
But any level of dampness will do.
Should You Wash It, or Just Dampen It?
It’s a good idea to take this opportunity to wash the item, but this is very much a personal choice
Launder it with your usual detergent, as long as it is suitable for the fibre.
It can also be dampened by saturating it in water, then squeezing out the excess water and/or pressing it in a towel.
Alternatively, it can be blocked dry and then steamed, although I don’t find this as effective.
Do You Have to Block It After Each Wash?
Generally, yes. But if acrylic has been heat-blocked, the shaping will be permanent and it won’t need to be blocked after each wash.
Other fibres may need a little blocking after each wash, but this will mostly just involve drying the item flat and shaping it.
How Do I Block Items That Aren’t Square or Round?
The same way, but it’s a good idea to use a template to make sure the shape is even.
What Can Go Wrong?
The main thing to avoid is pulling too hard or not using enough pins at the edges of the work, as this can create scalloped edges and points.
You can prevent this by gently pushing the work to the edges and using plenty of pins around the edges.
Blocking wires can also help prevent this.
What Is a Blocking Template?
This is basically a piece of paper with the shape of the item on it. It has circles or squares an equal distance apart, along with markings to help measure your piece to a set shape and size.
For square or rectangular items, you only need a grid, and many foam blocking boards will already have one.
When it comes to circles, doilies or snowflakes, you will need a circle guide with the same number of spokes as the points on your snowflake, doily or circle. If your item doesn’t have points, match the number of starting stitches with the number of spokes instead.
There are some great templates here by Kate Crochets.
http://katecrochets.blogspot.com/2006/11/blocking-guides-for-doilies-and.html
How Do You Use a Blocking Template?
If you already have a blocking board with grids or markings, you won’t need a template.
But if you don’t, my preferred way is to print the template on A4 paper. Then put it into a plastic sleeve protector and place it on the blocking board.
If the item is a bit larger, you can use the poster option on your computer to print the template over four or more pages. The pages can then be joined together on the blocking board.
If the item is very large, you don’t necessarily need a template. A measuring tape can be useful for keeping the measurements even on all sides.
Do You Need to Use a Blocking Template?
No, but it will help keep your work even and looking professional.
Have you found this useful? Please comment below
And feel free to share this blog, but please give me credit for it, and don't share parts of it