Craft Cove Blog

Tuesday, January 16, 2018

When a circle is not a circle

One of the main ways of creating a corner is by working 2 sts (or more) in the same stitch, with 1 or 2 chains between.


This is why a circle can start to look like a 8 pointed shape or octagon. Each of the increase stitches can become like a corner. This seems to be especially true for sc.


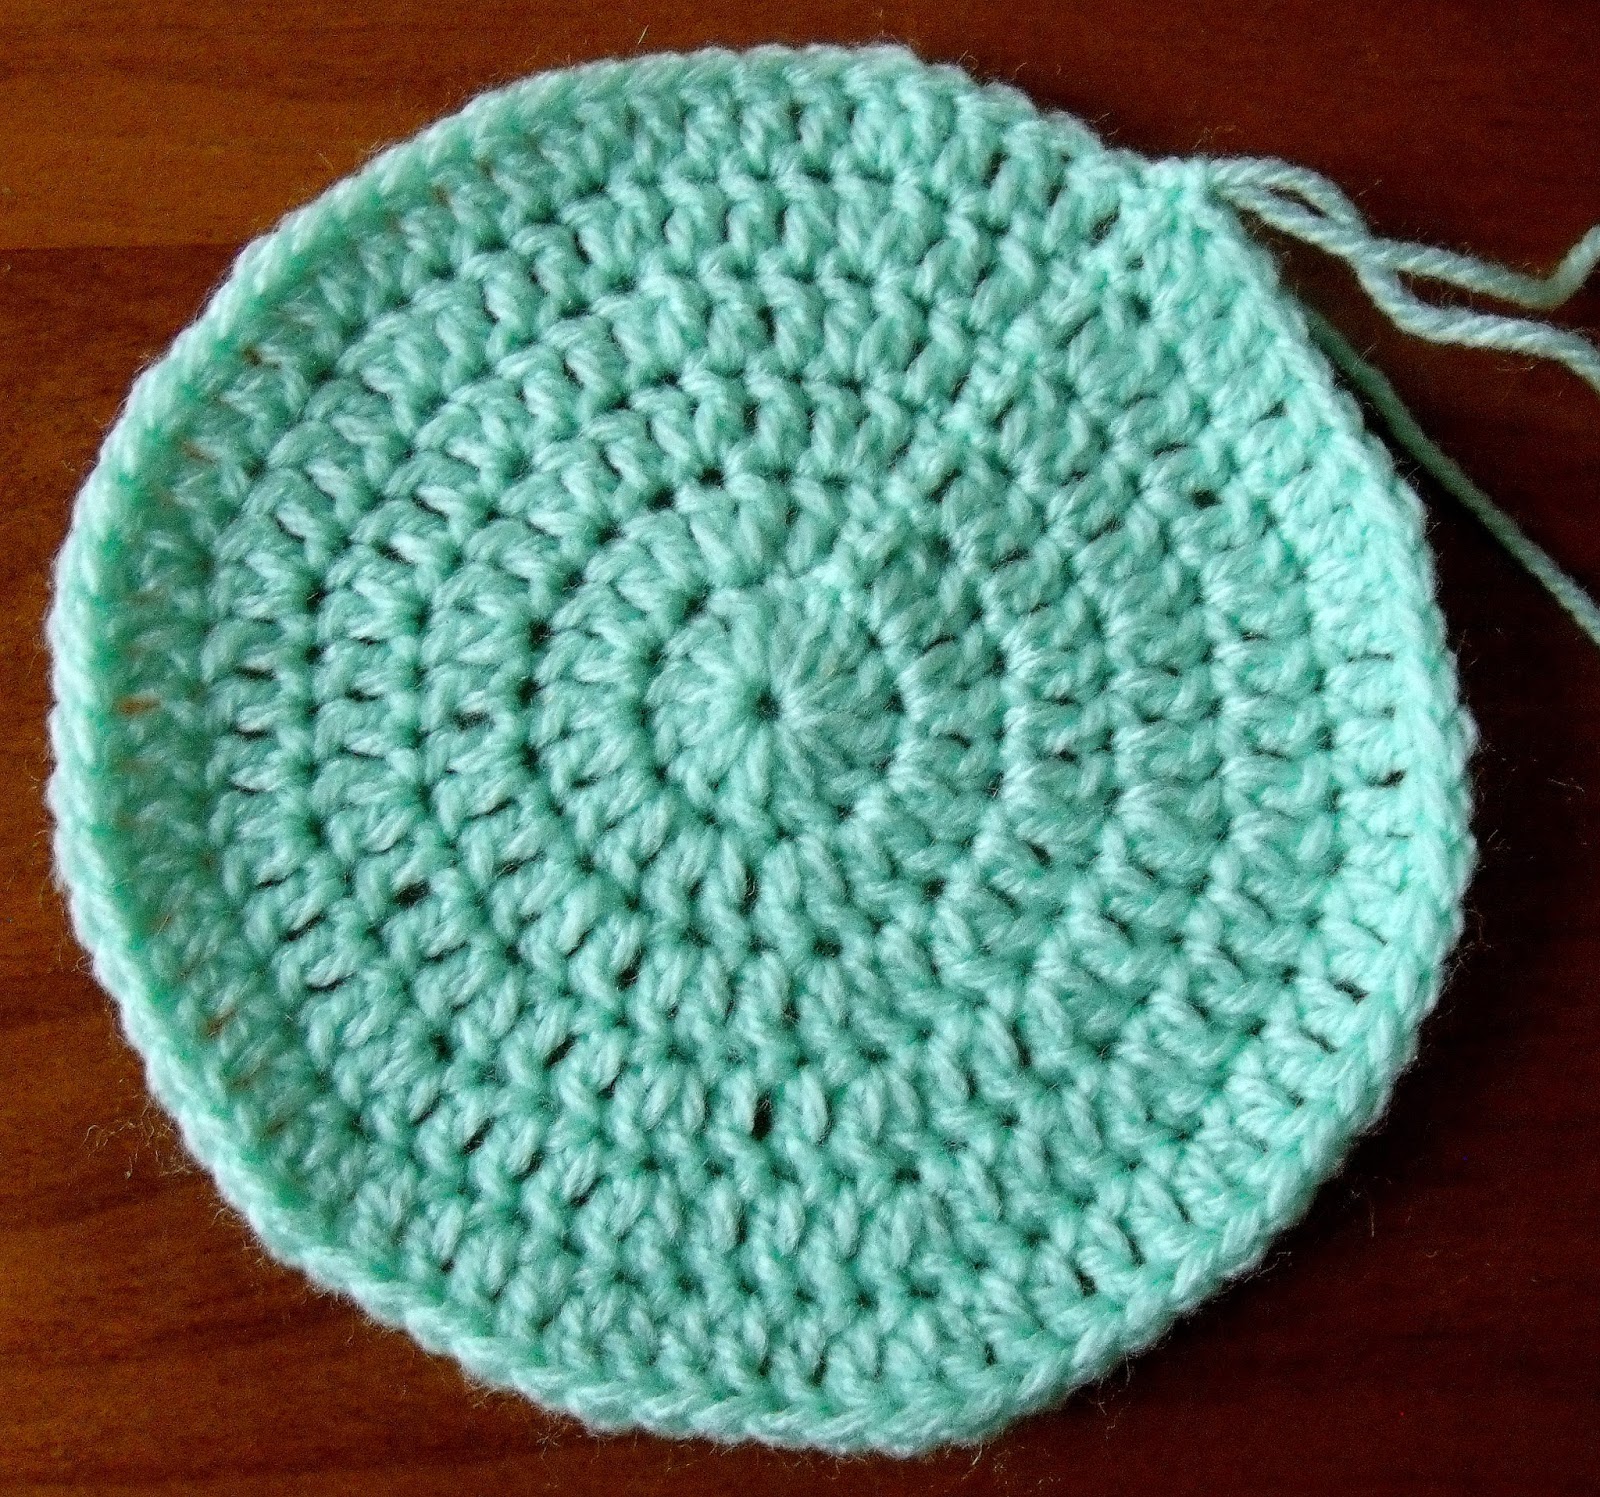
To avoid this you can stagger the increases.

Eg: Do the first 3 rows as a normal circle. In the next row, work half the single sts first, work as normal, then work the other half


Row 1: Magic circle, 8 sc in circle. (8 stitches)

Row 2: 2 sc in each stitch around (16 stitches)

Row 3: *1 sc in next st, 2 sc in next st. Repeat from * to end (24 stitches)

Row 4: 1 sc in 1st st, 2 sc in next st, *1 sc in each of next 2 sts, 2 sc in next stitch. Repeat from * to last st , 1 sc in last st (32 stitches)

Row 5: *1 sc in each of next 3 sts, 2 sc in next stitch. Repeat from * to end (40 stitches)

Row 6: 1 sc in each of next 2 sts, 2 sc in next st, *1 sc in each of next 4 sts, 2 sc in next stitch. Repeat from * to second last st, 1 sc in each of last 2 sts (48 stitches)

Row 7: *1 sc in each of next 5 sts, 2 sc in next stitch. Repeat from * to end (56 stitches)

Row 8: 1 sc in each of next 3 sts, 2 sc in next st, *1 sc in each of next 6 sts, 2 sc in next stitch. Repeat from * to second last st, 1 sc in each of last 3 sts (64 stitches)


The next image shows the improvement when working the stitches staggered


More on posts making circles


Tuesday, January 9, 2018

When The Flat Circle Goes Wrong


When crocheting in a circle, if there were never any increases, the crochet would form a tube.


To make a flat circle, you need to increase stitches. See my other post for the formula:  http://craftcove.blogspot.com.au/2017/12/making-flat-circle.html


There is a formula to create a flat circle, but not all patterns use the formula, or use the formula the same way. Or your tension may be different. This may cause the circle to go wrong. 

Sometimes it's actually part of the pattern design, and nothing to worry about.


The main problems that can happen are waving or curling


WAVING


If your circle is all wavy like the images above. The problem is that the outer edges are increasing in size more than needed.


This can happen if there are too many increases in the rows.

The answer is to reduce the increase stitches in each row. You could also try a smaller hook in the outer rows to try to "tighten" it


The above image shows the waving from earlier on. Try to fix it before it goes too far


CURLING

Curling is when the edges curl up into a bowl. The problem here is that the outer edges are not being increased enough.


To fix this problem, you need to increase some stitches evenly along the rows.

Sometimes a larger hook can help if used along the outer edges


Next week I'll talk about others things that can go wrong with the circle


More posts on making circles


Sunday, December 31, 2017

Making a Flat Circle

Often when crocheting you will want to create a lovely circle that will sit nice and flat


Some people say there is a secret formula to creating the perfect flat circle. But it's not really a secret, it's just a clever way to evenly increase around to keep it flat


When crocheting in a circle, if there were never any increases, the crochet would form a tube. 


To make it a flat circle, you need to increase stitches in each row

Here is the formula to use.


Formula

Increase by the starting number of stitches in every row.


Here's an example or the number increase:

Row 1: 12 stitches.

Row 2: 12 + 12 total 24 stitches,

Row 3: 24 + 12 total 36 stitches

Row 4: 36 + 12 total 48 stitches

Row 5: 48 + 12 total 60 stitches

Row 6: 60 + 12 total 72 stitches


The usual way to create this into a circle is by crocheting like this:

Row 1: Magic circle, 12 dc in circle. (12 stitches)

Row 2: 2 dc in each stitch around (24 stitches)

Row 3: 1 dc in next st, 2 dc in next st (36 stitches)

Row 4: 1 dc in each of next 2 sts, 2 dc in next stitch (48 stitches)

Row 5: 1 dc in each of next 3 sts, 2 dc in next stitch (60 stitches)

Row 6: 1 dc in each of next 4 sts, 2 dc in next stitch (72 stitches)


When making a circle in dc (tr UK/Aus) the most common number of starting stitches is 12, but it can be anything between 10 to 14 stitches for best results.

But use less for sc (dc in UK/Aus), 6 to 10 stitches works best


Next week I will explain what to do when things go wrong with the flat circle.


Tuesday, November 21, 2017

Gifts for Geeks


Who wants an interesting gift for a geeky friend or family member?

Why not help some Australian writers and artists at the same time.

And also help the Australian comic book industry


Most comic books are the floppy 32 page things you get from the newsagents.

Why don't you get an anthology instead.


Reverie is an anthology of many artists, many writers, many genres.


Lots of fun for the geek


It's a 112 page soft cover book


It contains some big names from DC comics, and Zooniverse. And some new names from Australia.


Saturday, November 11, 2017

Who remembers Reverie?

Australia is full of amazing artists, we need to get behind them!


Reverie - Australia’s Favourite Comics Anthology project video thumbnail

Back in the 80's a man named Gary Dellar produced a comic book anthology showcasing some of the most amazing writers and artists in Australia. The publication was called Reverie.

Image result for gary dellar


Gary himself, is a great writer and artist, and with the help of some of our amazing comic book talent, made this publication an amazing International success.

Reverie, also helped start the international career of some of the best in Australia.

Image result for gary dellar

Two of the big names that contributed to the publication are Fil Barlow and Michal Dutkiewicz

Fil Barlow, is now an artist, cartoonist, writer, production designer currently based in Los Angeles and he became the creator of Zooniverse.

Michal Dutkiewicz, is a professional illustrator and comic book artist based in Adelaide, South Australia, Michal went on to work for DC Comics

Image result for gary dellar

Gary, with the help of George Hall (another exceptional writer/artist who also contributed to Reverie in its first run), have decided it's time to show off some new talent, there is plenty more to choose from in Australia.

They have spent a lot of time and effort reviving Reverie, and have many new and exciting stories with a new generation of talent, along with some of the originals.

Image result for gary dellar

This is an exciting time for Australia, please get behind it by making a pledge in the kickstarter and spreading the word with everyone you know.


Monday, February 6, 2017

One Week to go

Sunburst Mandala Cushion CAL

 one week to go


With just one week to go, you might want to make sure you have got all the items you need. But if you're ordering it, and it hasn't come in yet, don't worry, the first part is easy and quick. You'll catch up in no time.


Of course the main thing you'll need is the yarn (or wool, as we call all fibers in Australia).

The original pattern was designed with 8 ply yarn, which is DK in US.  I realize it's not easy to get this weight in America, so if you don't want to bother ordering it, you can just use Aran weight, worsted weight (10 ply), you'll have a larger cushion, but it will be lovely. You could also use a finer yarn, or even thread. I'd love to see them done this way.

I chose acrylic, because it's nice and cheap, easy to get in Australia, and it's so easy to wash and dry. It also blocks beautifully with steam. 

But if you prefer, you can use wool or cotton, or whatever your favorite fiber is.

There are 4 colors in this pattern. I originally designed it with yellows eg. white, pale yellow, medium yellow, and a deep yellow. I have also made it with white, pale grey, darker grey, and black. You can use four shades of a color, or choose any four colors you prefer.


If you're using 8 ply acrylic, you will need approximately 120 grams of the palest color, and 100 grams of each of the other colors.

You will also need a 3.25 mm crochet hook, and a 3.50 mm crochet hook.  Or larger, or smaller, depending on your yarn


You might also want to familiarize yourself with these special stitches. (But they really aren't difficult)


Special stitches used:

  • Front Loop Only (FLO). Work this stitch in the front loop only, leaving back loop free.
  • Back Loop only (BLO). Work this stitch in the back loop only, leaving front loop free.
  • Front loop double crochet (fldc). Front loop double crochet is a dc worked in the front loop only.
  • Back loop double crochet (bldc). Back loop double crochet is a dc worked in the back loop only.
  • Front loop treble (fltr). Front loop treble is a tr worked in the front loop only.
  • Back loop treble (bltr). Back loop treble is a tr worked in the back loop only.
  • Front post double crochet (fpdc). Front Post Double Crochet is worked around the front of the post of the stitch on the previous round. Insert hook through the right front and back out the left front, yarn around hook, pull through 2 loops.
  • Front post treble (fptr). Front Post Treble is worked around the front of the post of the stitch on the previous round. Yarn around hook, insert hook through the right front and back out the left front, yarn around hook, pull through 2 loops, yarn around hook, pull through last 2 loops.
  • Front post double treble (fpdtr). Front Post Double Treble is worked around the front of the post of the stitch on the previous round. Yarn around hook, twice, insert hook through the right front and back out the left front, yarn around hook, pull through 2 loops, yarn around hook, pull through another 2 loops, yarn around hook, pull through last 2 loops.
  • Back post double crochet (bpdc). Back Post Double Crochet is worked around the back of the post of the stitch on the previous round. Insert hook through the right back and back out the left back, yarn around hook, pull through 2 loops.
  • Back post treble (bptr). Back Post Treble is worked around back of the post of the stitch on the previous round. Yarn around hook, insert hook through the right back and back out the left back, yarn around hook, pull through 2 loops, yarn around hook, pull through last 2 loops.
  • Back post double treble (bpdtr). Back Post Double Treble is worked around the back of the post of the stitch on the previous round. Yarn around hook, twice, insert hook through the right back and back out the left back, yarn around hook, pull through 2 loops, yarn around hook, pull through another 2 loops, yarn around hook, pull through last 2 loops.
Don't be intimidated by these stitches, they're just basic stitches worked into different places.


And now you should be ready to start.


Get the pattern here:  http://www.ravelry.com/patterns/library/sunburst-mandala-cushion  (available 13th February)

Join in the discussion here:  http://www.ravelry.com/groups/craft-cove-crochet


Add this

| More